Encountering issues with your Swiffer WetJet not spraying can be frustrating, especially when you’re in the middle of your cleaning routine. This blog post addresses the most common problems that might cause your Swiffer WetJet to malfunction and provides step-by-step guides to resolve these issues. From clogged nozzles to blocked fluid pathways, we’ve got you covered.

Swiffer WetJet Won’t Spray Common Issues:
- Clogged Nozzles: Over time, the spray nozzles become clogged with cleaning solution residue or dirt, preventing the fluid from spraying out.
- Battery Problems: Since Swiffer WetJets are battery-operated, depleted or weak batteries can lead to insufficient power to operate the spray mechanism.
- Faulty Pump or Motor: The internal pump or motor, which is responsible for pushing the cleaning fluid through the system, can malfunction or seize, especially if exposed to moisture or cleaning fluid leakage.
- Damaged or Loose Connections: Loose or damaged connections within the internal tubing that carries the cleaning solution from the reservoir to the nozzles can disrupt the spray function.
- Empty or Improperly Seated Reservoir: An empty cleaning fluid reservoir or one that is not properly seated can prevent fluid from being drawn into the system for spraying.
- Blocked Fluid Pathway: Any blockage in the fluid pathway from the reservoir to the nozzles can hinder the spray function.
1. Clogged Nozzles
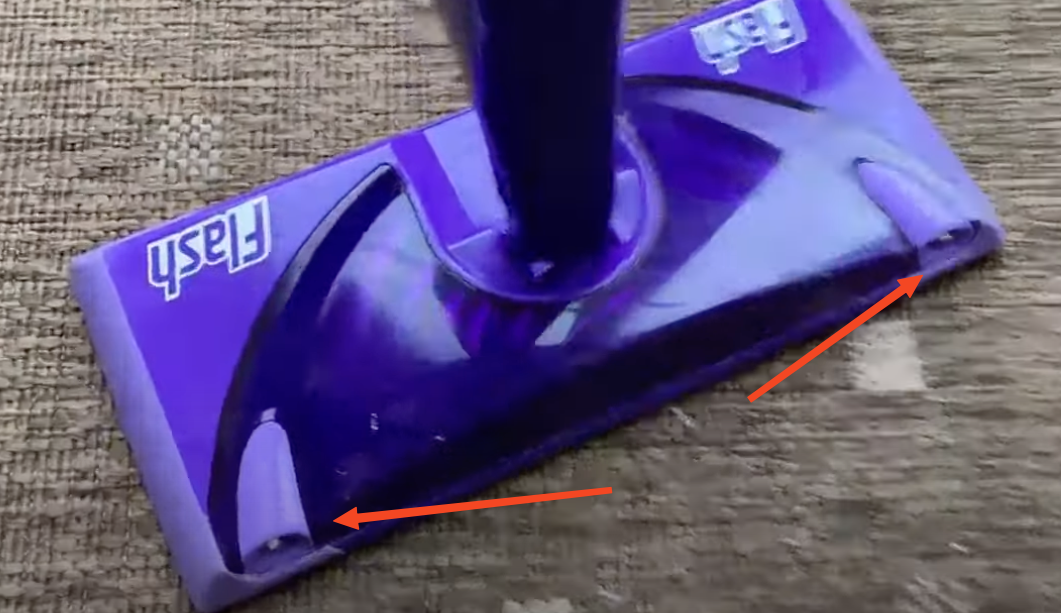
Firstly, it’s crucial to confirm that clogged nozzles are indeed the cause when your Swiffer WetJet won’t spray. Look closely at the nozzle area, which is typically found at the head of the mop. If you notice any residue or blockage, it’s a clear indicator that the nozzles are clogged.
Step 1: Soak the Nozzle Area Begin by soaking the nozzle area in warm water for several minutes. This process helps loosen any dried cleaning solution or debris that might be causing the blockage.
Step 2: Gently Clean the Nozzles After soaking, use a small brush, like an old toothbrush, or a pin to gently remove any residue from the nozzles. Be careful not to damage the nozzles while cleaning.
Step 3: Rinse and Dry Once you’ve cleaned the nozzles, rinse the area with clean water and then dry it thoroughly. Ensuring the nozzles are completely dry before reassembling the mop is crucial.
Step 4: Test the Swiffer WetJet After reassembling your Swiffer WetJet, test it to see if the cleaning fluid sprays properly. If it does, your problem is solved!
Preventing Future Clogs in Your Swiffer WetJet To prevent your Swiffer WetJet from getting clogged nozzles in the future, consider the following tips:
- Regularly clean the nozzles following the steps above.
- Use recommended cleaning solutions as some may be less likely to cause clogs.
- After each use, clear the spray mechanism by running clean water through it.
Also read: How to Fix Swiffer Mop Not Spraying
2. Battery Problems
Another common problem faced by many Swiffer WetJet users is the device failing to spray, often due to battery-related issues. Understanding how to diagnose and fix these battery problems can quickly get your Swiffer WetJet back in action, ensuring your cleaning routine is efficient and hassle-free.
Step 1: Locate the Battery Compartment The battery compartment is usually found in the handle or body of the Swiffer WetJet. Open it to access the batteries.
Step 2: Remove Old Batteries Carefully remove the old batteries from the compartment. It’s a good practice to check for any corrosion or residue, as these can also affect performance.
Step 3: Insert New Batteries Place new batteries in the compartment, making sure they are correctly oriented according to the positive (+) and negative (-) signs.
Step 4: Test the Swiffer WetJet After replacing the batteries, reassemble the unit and test to see if it sprays correctly. If it does, the problem was indeed with the batteries.
Tips for Battery Maintenance in Your Swiffer WetJet To ensure prolonged battery life and prevent future issues with your Swiffer WetJet, consider the following tips:
- Use high-quality alkaline batteries for better performance.
- Remove batteries if you plan not to use the WetJet for an extended period.
- Regularly check for and clean any battery corrosion.
Also read: How to Fix Swiffer WetJet Leaking from Bottom
3. Faulty Pump or Motor
When your Swiffer WetJet won’t spray, the motor or pump may be to blame. Symptoms like humming without spraying or complete silence when the spray button is pressed indicate potential motor or pump issues.
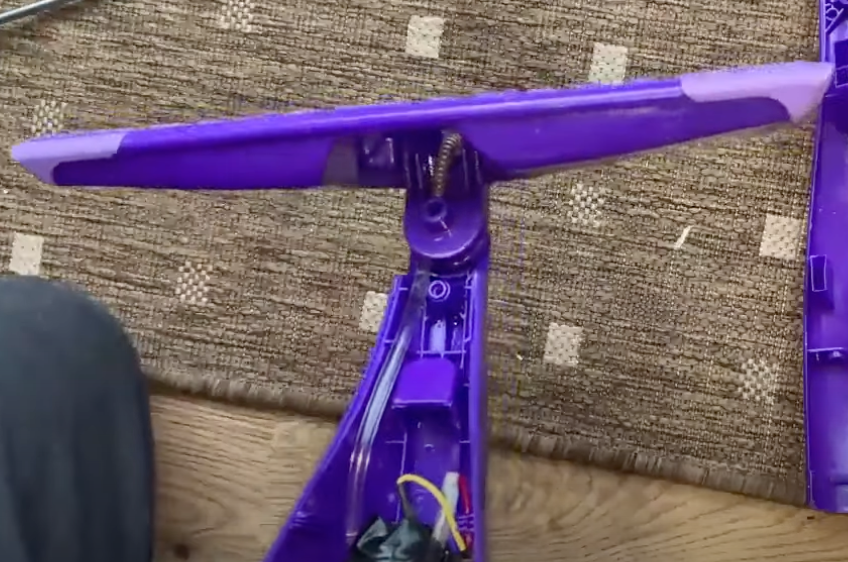
Step 1: Access the Motor Start by removing the cleaning fluid container. Unscrew any necessary screws at the top and bottom to access the internal motor. This may vary depending on your specific Swiffer WetJet model.
Step 2: Inspect the Motor for Rust or Damage Check the motor for signs of rust or damage, especially if cleaning fluid has leaked onto it. Rust can cause the motor to seize, preventing it from operating correctly.
Step 3: Manually Free the Motor Use a small piece of plastic to gently turn the motor a few times. This can help loosen any rust or debris that’s causing the motor to stick. Be careful not to damage the motor in the process.
Step 4: Test the Swiffer WetJet After freeing the motor, press the spray button. If the motor starts and the WetJet sprays properly, you have successfully resolved the issue.
Preventative Maintenance for the Swiffer WetJet Motor To avoid future motor or pump issues with your Swiffer WetJet:
- Regularly check for leaks and clean any spillage immediately.
- Avoid overfilling the cleaning fluid container.
- Store the WetJet in a dry area to prevent moisture accumulation.
4. Damaged or Loose Connections
When your Swiffer WetJet won’t spray, it’s important to check for any internal connection issues. Signs of this problem include irregular spray patterns or a complete lack of spraying, suggesting that the internal tubing carrying the cleaning solution might be compromised.
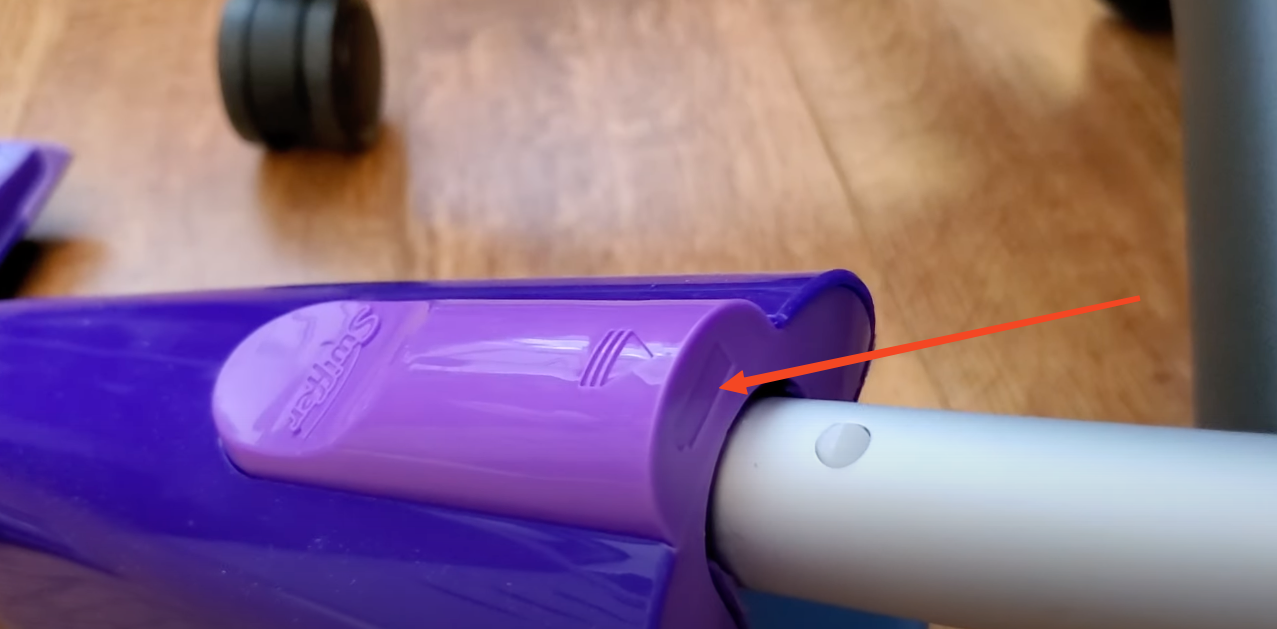
Step 1: Inspect Internal Tubing and Connections Carefully open the Swiffer WetJet to access its internal parts. Look for any tubing that appears loose, disconnected, or damaged.
Step 2: Secure Loose Connections If you find any loose tubes, gently push them back into place or tighten any loose connections. Ensure that each tube is securely connected to prevent any leaks or blockages.
Step 3: Replace Damaged Parts In case of damaged tubes or connections, you may need to replace these parts. Depending on the extent of the damage, consider contacting the manufacturer for replacement parts or seek professional help.
Step 4: Reassemble and Test Your Swiffer WetJet Once all connections are secure and any damaged parts are replaced, reassemble your Swiffer WetJet. Test the spray function to ensure the issue has been resolved.
Maintaining Your Swiffer WetJet to Prevent Connection Issues To minimize the risk of future connection problems:
- Handle your Swiffer WetJet carefully to avoid dislodging internal components.
- Perform regular checks and maintenance to ensure all parts are in good condition.
- Store your Swiffer WetJet in a safe place where it’s less likely to be jostled or damaged.
5. Empty or Improperly Seated Reservoir
When your Swiffer WetJet won’t spray, it’s crucial to first check if the problem is due to an empty or improperly seated reservoir. This is often indicated by the absence of any noise or spray when the trigger is pressed, suggesting that the device is not drawing any cleaning fluid.
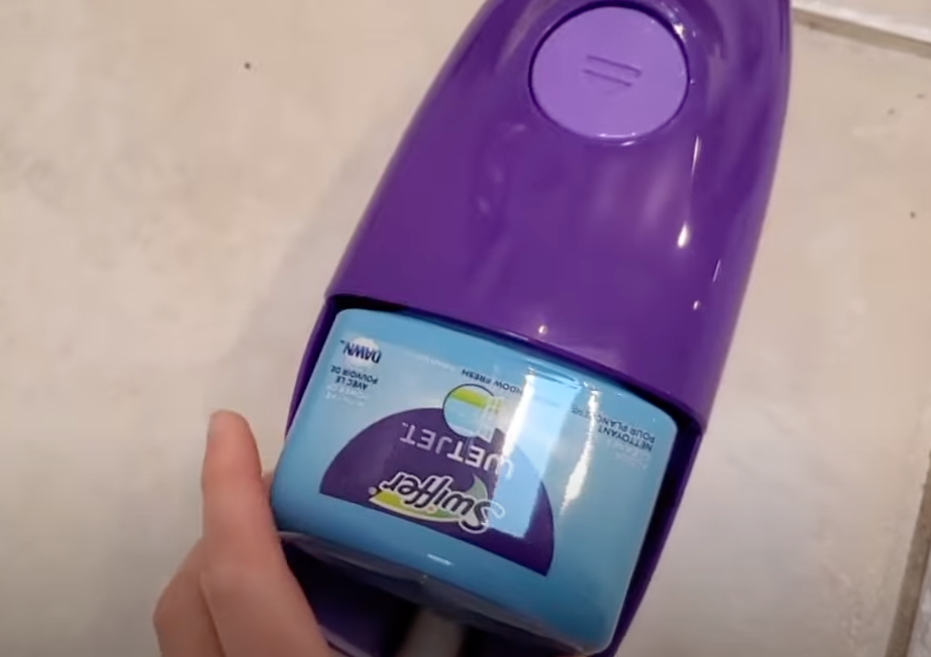
Step 1: Check the Fluid Level Ensure that the cleaning fluid reservoir is not empty. If it is, refill it with an appropriate cleaning solution compatible with your Swiffer WetJet.
Step 2: Remove and Reinsert the Reservoir If the reservoir is not empty, remove it and then reinsert it. Ensure that it is properly seated and fully clicks into place. An improperly seated reservoir can prevent the cleaning solution from being pumped through the system.
Step 3: Test the Swiffer WetJet After ensuring that the reservoir is correctly placed and filled, test your Swiffer WetJet by pressing the spray button. A properly functioning spray indicates that the reservoir issue has been resolved.
Tips for Proper Reservoir Maintenance in Your Swiffer WetJet To avoid future issues with the reservoir:
- Regularly check the fluid level and refill as necessary.
- Ensure that the reservoir is always securely clicked into place after refilling.
- Clean the reservoir area occasionally to prevent any build-up that might hinder proper seating.
6. Blocked Fluid Pathway
When your Swiffer WetJet won’t spray, it’s important to consider the possibility of a blocked fluid pathway. This can occur due to debris or sediment build-up within the tubes that carry the cleaning solution. A telltale sign of a blockage is when the WetJet motor runs but no fluid is dispensed.
Step 1: Inspect the Fluid Pathway Carefully open your Swiffer WetJet to access the internal fluid pathway. Check for any visible blockages or kinks in the tubing that might be hindering the flow of the cleaning solution.
Step 2: Clear Blockages If you find a blockage, gently remove it. This might involve cleaning the tubing or straightening it out if it’s kinked. Be cautious not to damage the tubing in the process.
Step 3: Test the Swiffer WetJet After clearing the blockage and ensuring the tubing is properly aligned, reassemble your Swiffer WetJet. Test it by pressing the spray button to see if the issue has been resolved and the cleaning solution is spraying effectively.
Preventing Fluid Pathway Blockages in Your Swiffer WetJet To minimize the risk of future blockages:
- Regularly clean the fluid pathway and check for any sediment build-up.
- Use recommended cleaning solutions, as some may be less prone to causing blockages.
- After each use, run clean water through the system to clear any remaining cleaning solution.
Conclusion
Resolving issues with your Swiffer WetJet not spraying can be straightforward with the right approach. By following these tips, you can ensure your Swiffer WetJet continues to be an indispensable tool in your cleaning arsenal. Regular maintenance and prompt addressing of any issues will keep your floors clean and your WetJet in good working condition. You can also explore other solutions customers mention on Amazon.


")
